Importing Pictures |
  
|
| Show/Hide Hidden Text |
Importing Pictures |
|
| Show/Hide Hidden Text |

To bring a picture into Sketchpad from some other application, such as a web browser, use either of two methods: drag and drop or copy and paste. Drag and drop is often more convenient, but not all other applications support it. Copy and paste takes a few steps more, but is more widely supported, and can also allow you to define a picture’s size and shape based on selected points.
Both methods allow you to import many kinds of pictures, including .jpg, .gif, .png, .bmp, and .tif.
You can often drag either a picture or a picture file directly from some other application into your sketch window.. When you drag the picture or picture file over the sketch window, the pointer displays a + sign. Position the picture where you want it to appear and release the button to drop the picture. You can drop the picture onto a point to attach the picture to the point. You can drop the picture onto an existing picture to replace the existing picture. Most browsers and many other applications support drag and drop, as do the desktops of both Mac and Windows systems. To use a picture from an application that doesn’t support drag and drop, copy the picture from that application and paste it into Sketchpad. |
You can copy a picture from another application and paste it into your sketch. 1.Select and copy the picture in the other application. 2.Switch to Sketchpad and choose Edit | Paste Picture. If there are no selected points in your sketch when you paste a picture, the result is an independent picture, not attached to any other sketch object. If there are one, two, or three selected points, the picture will be attached to the points. If there’s a single selected picture (or a selected transformed or iterated image of a picture), the new picture will replace the selected one. |
To create a picture from scratch, choose the Marker tool and begin drawing in an empty part of the sketch. Anything you draw will be included in the drawing until you choose a different tool or choose a menu command. Use the resulting drawing like any other picture. You can even copy it or cut it and then paste it to attach it to one, two, or three points. |
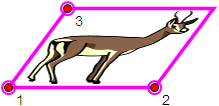
Control a picture’s location dynamically by attaching it to a point. Control the size or shape of a picture by pasting it onto two or three selected points.
|
Use either drag and drop or copy and paste to replace an existing picture. Drag and Drop:1.Drag a picture from some other application. 2.In your sketch, drop it onto an existing picture or onto a transformed or iterated image of an existing picture. Copy and Paste:1.Copy a picture from another application, 2.In Sketchpad, select a single picture or a transformed or iterated image of a picture. 3.Choose Edit | Paste Replacement Picture. The new picture replaces the existing one. |
Sketchpad normally makes pure white portions of an imported picture completely transparent, so that you can see through it to other pictures or interiors underneath. (The transparency of these white portions of the picture is independent of the picture’s opacity setting, which applies to the rest of the picture.) If you hold the Shift key while you drop or paste a picture into Sketchpad, pure white portions of your picture will be treated like the rest of the picture, with their opacity determined by the picture’s Opacity properties. Points, lines, circles, text, and all other non-layered objects are always drawn on top of pictures.
|
When you drop a picture that contains size information, it's normally imported at its original size, even though the picture may have a higher resolution than the screen. For instance, if you import a picture that's 0.5 inches square at 600 dpi, the original has 300 dots per side. When you import it to Windows, which normally has a screen resolution of 96 dpi, the picture will still be 0.5 inches square, so will have 48 dots per side. To import the picture at its full original detail, hold the Alt key (Windows) or Option key (Mac) when you drop it. In the example, the picture will appear in Sketchpad with 300 dots per side, and will measure 300/96 = 3.125 inches on a side. |